May 24, 2022
Use your own connector with Twitter and Aiven for Apache Kafka®
What if Aiven doesn't provide the Apache Kafka® connector you want? Read on to learn how to use an external connector, to gather Twitter messages into Kafka.
Francesco Tisiot
|RSS FeedHead of Developer Experience at Aiven
Use your own connector with Aiven for Apache Kafka® - the Twitter source example
Apache Kafka® is representing the central data backbone for more and more companies, with the rich Apache Kafka® Connect ecosystem offering different plugins allowing an easy integration of Kafka with a huge variety of technologies.
When self-hosting Apache Kafka, any open source connector plugin can be taken into use by finding the right jars and configuration options. The situation changes when using a managed service: even if the list of supported plugins can be amazing (check out all the ones Aiven provides), you might not find the particular sink-to-obscure-datatech one you were looking for. Still, Aiven accepts suggestions and evaluates continuously new connector plugins to include in the list, so, if you identify an important miss, feel free to suggest!
Another option on the table is to create a self-managed Apache Kafka® Connect cluster and connect it to Aiven for Apache Kafka. In this way you can get the freedom to pick any open source connector, while still benefitting from the managed Kafka service that Aiven offers. You can read an example of the process in our developer portal, and in this blog post we'll go through the steps required to start using one of the best connectors in town, the one probably used by 90% of new learners: the Twitter source connector.
Create the Apache Kafka cluster
Let's quickly cover this piece, using the Aiven CLI and the dedicated service create function. You can read all the parameters available in the dedicated page and also find the list of all the advanced customisation parameters Aiven offers. For the aim of the blog post we'll use the following:
avn service create demo-kafka               \
    --service-type kafka                    \
    --cloud google-europe-west3             \
    --plan business-4                       \
    -c kafka.auto_create_topics_enable=true \
    -c kafka_rest=true
The above command creates an Aiven for Apache Kafka instance named demo-kafka with a juicy business-4 plan over the google-europe-west3 region. We are also enabling the automatic creation of topics and REST APIs, which we'll use towards the end to check the data landing in the topic.
While the service is starting, we can already generate the Java keystore and truststore that will be used to integrate the local Apache Kafka Connect cluster to the demo-kafka service.
We can create both stores with the following Aiven CLI command:
avn service user-kafka-java-creds demo-kafka \
    -d certsfolder                           \
    -p STOREPASSWORD123                      \
    --username avnadmin
The above will download the required certificates in a folder named certsfolder and create in the same folder a keystore file named client.keystore.p12 and a truststore named client.truststore.jks, all secured with a (not so secure) password STOREPASSWORD123. You might want to review the dedicated developer portal document if you're keen on setting different secrets to secure the stores and keys.
Create a self-managed Apache Kafka Connect cluster
Now it's time to use our shell skills, the only prerequisite is to have a JDK installed. Let's start by getting the Apache Kafka binaries, we'll download the 3.1.0 version
wget https://dlcdn.apache.org/kafka/3.1.0/kafka_2.13-3.1.0.tgz
Then we can unpack it
tar -xzf kafka_2.13-3.1.0.tgz
And this will create a folder called kafka_2.13-3.1.0 containing all the Apache Kafka goodies.
Add the Twitter source connector dependencies
To start fetching twitter data, we can use the dedicated open source connector. We can fetch the related code with:
wget https://github.com/jcustenborder/kafka-connect-twitter/releases/download/0.2.26/kafka-connect-twitter-0.2.26.tar.gz
And unpack the tar file
mkdir twitter-connector
tar -xvf kafka-connect-twitter-0.2.26.tar.gz -C twitter-connector
The above command will unzip the tar file into a folder called twitter-connector which contains a subfolder usr/share/kafka-connect/kafka-connect-twitter containing all the files the Apache Kafka Connect cluster needs to load. We can move them to a plugin subfolder within the kafka_2.13-3.1.0 folder.
mkdir kafka_2.13-3.1.0/plugins
mv twitter-connector/usr/share/kafka-connect/kafka-connect-twitter kafka_2.13-3.1.0/plugins/lib
Define the Apache Kafka Connect configuration file
Now it's time to define a configuration file to make the local Kafka Connect cluster point to Aiven for Apache Kafka. We can use the developer portal template to create a file named my-connect-distributed.properties and substitute:
PATH_TO_KAFKA_HOMEto the directory containing the Apache Kafka binariesAPACHE_KAFKA_HOST:APACHE_KAFKA_PORTwith thedemo-kafkahostname and port that we can get with
avn service get demo-kafka --format '{service_uri}'
TRUSTSTORE_PATHandKEYSTORE_PATHwith the path to the folder containing the keystore and truststore files (certsfolderif you used the command defined in the previous section)KEY_TRUST_SECRETwith the keystore and truststore secret (STOREPASSWORD123if you used the command defined in the previous section)
Start the local Connect cluster
With the configuration and all the required files in place we start the local Apache Kafka Connect cluster with:
./kafka_2.13-3.1.0/bin/connect-distributed.sh ./my-connect-distributed.properties
Setup the Twitter access
Now that the Apache Kafka Connect cluster is up and running, we can head to the Developer Portal at Twitter's developer portal page to create a new application that will provide us the credentials required for the connector to start sourcing tweets.
-
In the main dashboard page we can create a new project using the v2 endpoints. For the project we need to specify:
- the project name
- the use case between a variety of options including Exploring the API, Making a bot or Building a consumer tool, we can chose between one of the options available that fits our purpose
- the project description, we can give an abstract of our purpose
- define if we are going to use an existing app or create a new. Since we're new to Twitter APIs we'll create a new app
-
In the App Setup section we can define our new app settings:
- the app environment, for the blog post purposes we can select Development
- the app name, giving the app a memorable name allows us to backtrack what's the app used for, a name like
app123will hardly be recognizable. We can call ittwitter-kafka-connect-<SUFFIX>where<SUFFIX>needs to be a unique identifier (every app name needs to be unique). - the app keys and tokens, we can generate and retrieve the needed keys. We need to copy from this section the API Key and API Key Secret that we'll later use in the Apache Kafka connector setup (we'll reference them as
TWITTER_API_KEYandTWITTER_API_SECRET).
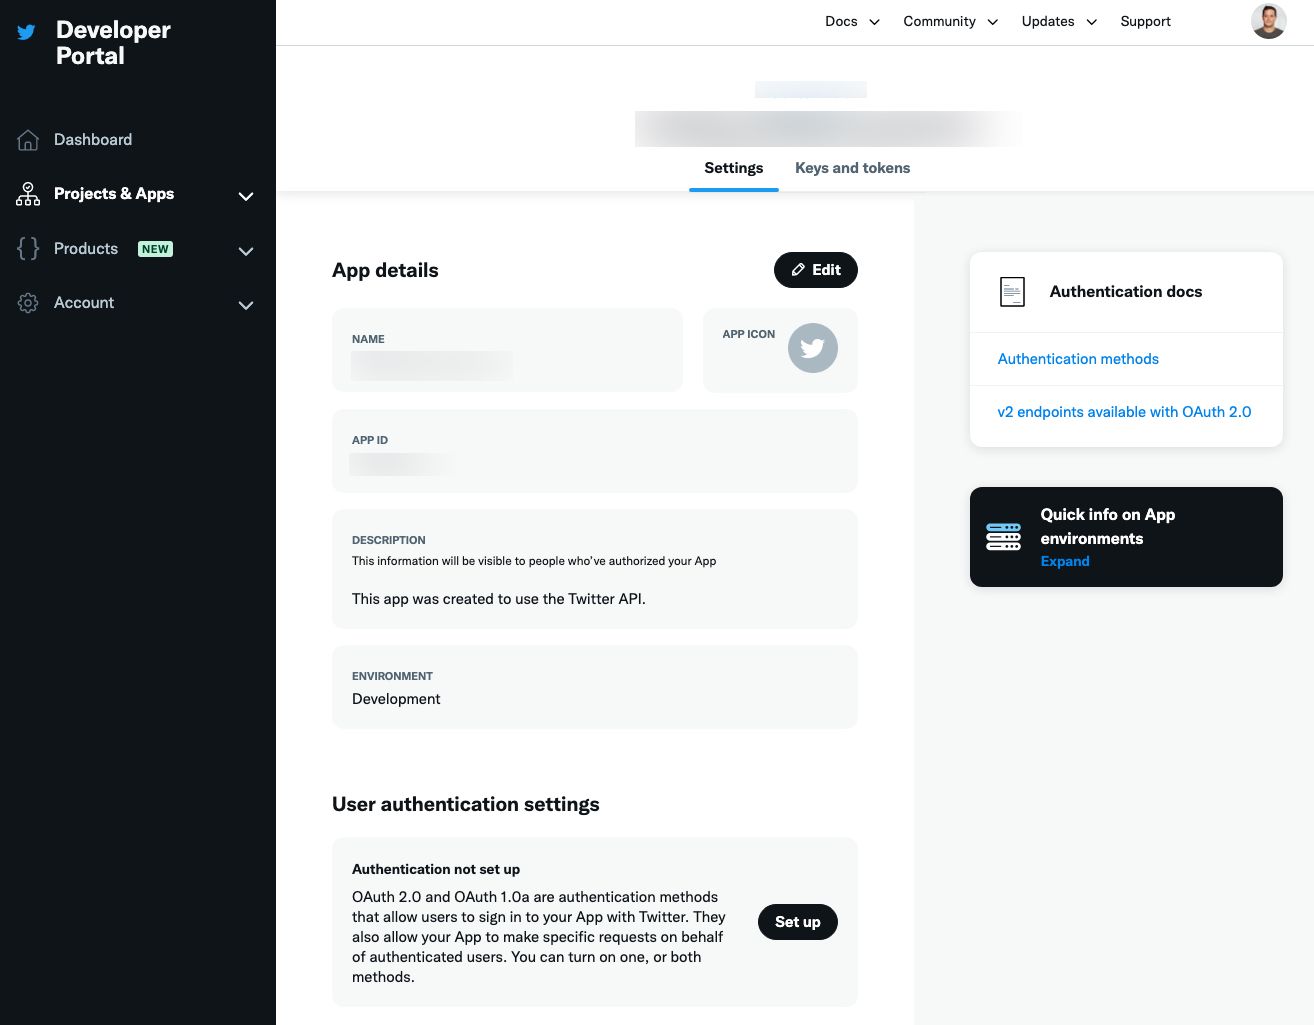
When everything is setup, select App Settings and we should see a screen like the following telling us the app and project have successfully been built.
-
Now we can head to the Keys and tokens tab where we can generate (or regenerate) the additional secrets required for the connector to work.
-
Generate the Access Token and Secret that we'll reference further down in the blog
- Access Token:
TWITTER_ACCESS_TOKEN - Access Token Secret:
TWITTER_ACCESS_TOKEN_SECRET
- Access Token:
-
The last setting in the Twitter developer portal is to request Elevated access for our project. Since Twitter API v2 was released, the default (Essential) access only allows interacting with v2, while the Apache Kafka connector we'll adopt still uses the v1. We can request the Elevated access by clicking on the main project name and on the button "Apply for Elevated". We would need to fill some information including the coding skill level and the project description and agree to the Developer Agreement. The request is officially checked by Twitter, and if everything goes well, we should soon have an elevated account ready, although sometimes it might take a couple of hours.
Create a source connector configuration file
We can write the twitter secrets fetched above in a configuration file named twitter-source.json with the following content
{
    "name":"twitter_connector",
    "config":
        {
            "tasks.max":"1",
            "connector.class":"com.github.jcustenborder.kafka.connect.twitter.TwitterSourceConnector",
            "process.deletes":"false",
            "filter.keywords":"database",
            "kafka.status.topic":"twitter-topic",
            "twitter.oauth.consumerKey":"TWITTER_API_KEY",
            "twitter.oauth.consumerSecret":"TWITTER_API_SECRET",
            "twitter.oauth.accessToken":"TWITTER_ACCESS_TOKEN",
            "twitter.oauth.accessTokenSecret":"TWITTER_ACCESS_TOKEN_SECRET"
        }
}
The following are the customizable parameters:
"process.deletes":"false": for simplicity we are not going to process tweet deletions"filter.keywords":"database": we are filtering for tweets containing thedatabasekeyword, you can modify it to filter only the tweets you are interested in. The suggestion is to replace it with something topical at the moment of reading, that will occur in tweets so that data will show up in Apache Kafka."kafka.status.topic":"twitter-topic": the target topic is going to be namedtwitter-topic- The
twitter.oauthparameter values need to be changed with the twitter secrets fetched in the previous step
Start the Twitter source connector
All the pieces are in place now, it's therefore time to start the connector using the Apache Kafka REST API with:
curl -s -H "Content-Type: application/json" -X POST   \
    -d @twitter-source.json                           \
    http://localhost:8083/connectors/
Check the output in Apache Kafka
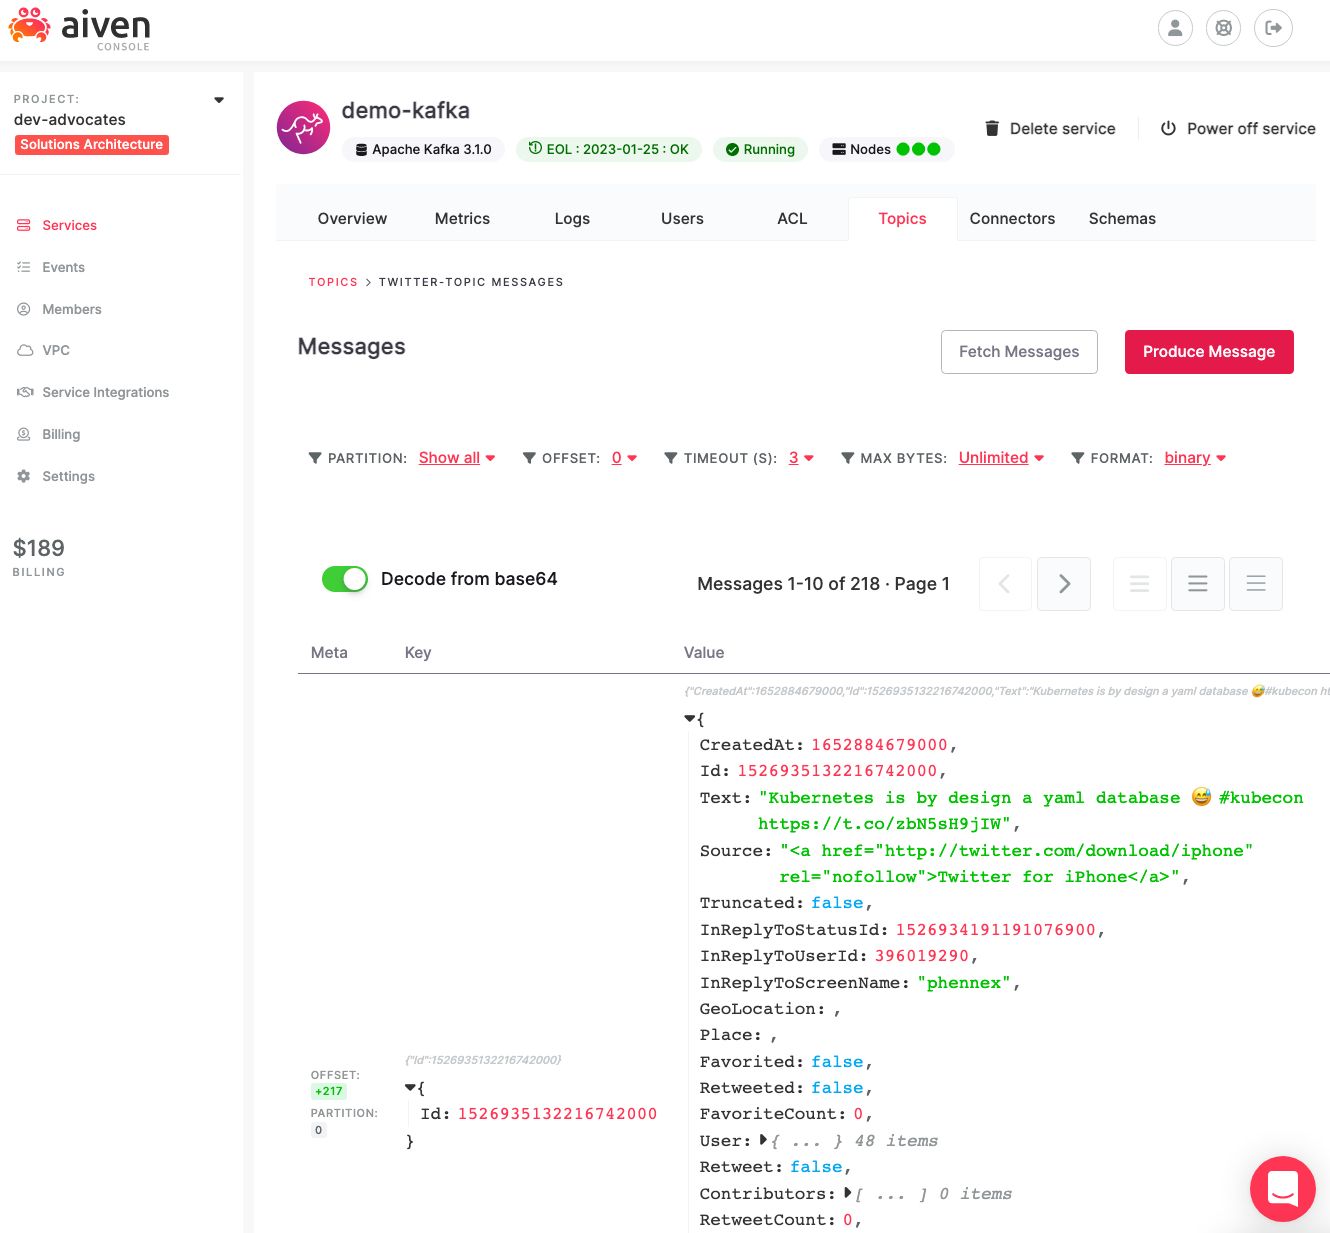
The above curl command uses the connectors REST endpoint passing the connector configuration file twitter-source.json. We should now see the tweets containing apachekafka flowing in the twitter-topic Apache Kafka topic. Since we enabled Karapace REST APIs, we can review the topic data by accessing the Aiven Console, clicking on the demo-kafka service name, under the Topic tab.
Keep in mind that this is a streaming solution, so you'll see data in the topic only if tweets containing the keyword you defined are written. If you want to test the connector, write a tweet yourself containing the keyword!
Big news: we are now using an Apache Kafka® Connector plugin not supported by Aiven with Aiven for Apache Kafka! We'll have the burden of managing the Apache Kafka Connect cluster, but that might be the optimal option in case our source/target technology is not supported with any of the available connectors.
Quick Tip: If you need to change the connector configuration you might need to delete the connector first with
curl -s -X DELETE http://localhost:8083/connectors/twitter_connector
And then send the updated configuration file using the curl command with the PUSH option specified before.
Managed Apache Kafka services and freedom of connector plugins selection
Managing full Apache Kafka clusters can be a tedious job and using a managed service like Aiven for Apache Kafka is usually a sensible idea. For peculiar use cases, you might find that the configuration or connector you're looking for is not supported by Aiven. But don't despair: you can easily integrate a local Apache Kafka Connect cluster solving your particular integration problem with Aiven for Apache Kafka and benefit both from an overall Apache Kafka managed solution and a wild selection of open source connectors.
Check out the following resources to know more:
- List of the supported Apache Kafka Connect plugins
- List of the Aiven for Apache Kafka advanced configuration parameters
- The Twitter source connector documentation
- A detailed article on how to setup a local JDBC sink connector
Further reading
Stay updated with Aiven
Subscribe for the latest news and insights on open source, Aiven offerings, and more.


